How to Set Up a Portable Cold Plunge at Home (2026 Guide)
Share
How to Set Up a Portable Cold Plunge at Home: Complete 2026 Guide
You've decided to start cold plunging at home.
The tub arrives.
You open the box.
And suddenly the simple idea of "fill it with cold water and get in" raises a surprising number of questions.
Where should I put it?
Can it sit on my deck?
How full should I fill it?
Do I need a chiller?
Can I just use ice?
What are all these hoses for?
How do I keep the water clean?
Can I leave it outside?
And perhaps most importantly:
How complicated is this actually going to be?
The good news is that setting up a portable cold plunge is usually much easier than it looks.
You can start incredibly simply—with a tub, water and ice—or build a more automated system with a water chiller and filtration system that keeps your plunge cold, circulating and ready when you are.
That's one of the things I like most about a portable cold plunge.
You don't have to build the ultimate setup on day one.
You can start where you are.
So in this guide, I'm going to walk you through how to set up a portable cold plunge at home, step by step, including the little things I would want someone to tell me before I filled the tub for the first time.
Let's get your cold plunge ready.
Portable Cold Plunge Setup: The Quick Version
If you want the simple answer first, here it is:
-
Choose a level, sturdy location with easy access to water and drainage.
-
Put down the protective mat if your plunge includes one.
-
Unfold and inspect your inflatable cold plunge.
-
Inflate the tub according to the manufacturer's instructions.
-
Install or close the drain fittings and confirm all connections are secure.
-
If using a chiller or filtration system, connect the appropriate inlet and outlet hoses before operation.
-
Fill the tub with clean water.
-
Cool the water using ice or your compatible water chiller.
-
If using powered equipment, verify water flow and check every connection for leaks before running the chiller.
-
Cover the plunge when you're finished to help keep debris out and cold in.
That's the basic process.
But a little planning before Step One can save you a lot of frustration later.
And by frustration, I mean:
"Why did I fill 100 gallons of water before realizing I wanted this three feet to the left?"
Let's avoid that.
Step 1: Decide Where Your Cold Plunge Will Live
Before inflating anything, decide where you actually want your cold plunge.
This is probably the most important setup decision you'll make.
Once your plunge is filled, moving it becomes a completely different project.
Water weighs approximately 8.34 pounds per gallon.
That means 100 gallons of water weighs roughly 834 pounds—before adding the weight of the tub or the person using it.
A larger 150-gallon plunge contains around 1,250 pounds of water.
So this isn't something you want to fill first and reposition later.
Choose the location before you add water.
Can You Put a Portable Cold Plunge Outside?
Many portable cold plunges are designed for indoor or outdoor use, including the RevX inflatable models I carry at RevitaSpring.
Outdoor setups can be wonderful because water spills and drainage tend to be easier to manage.
A patio, covered deck, garage, dedicated wellness area or sheltered section of the yard may all work depending on your equipment and climate.
But "outdoor rated" doesn't mean you should ignore the environment.
Think about:
-
direct sunlight
-
rain
-
snow
-
freezing temperatures
-
extreme heat
-
falling leaves
-
dirt
-
irrigation
-
access to electricity
-
access to a hose
-
drainage
If you're using a chiller or powered filtration equipment, follow the manufacturer's requirements for weather exposure, ventilation and electrical protection.
And if you're placing a filled plunge on a deck or elevated surface, make sure the structure is designed to safely support the total filled weight.
When in doubt, have the structure evaluated by a qualified professional.
Can You Put a Cold Plunge Indoors?
Absolutely—if the space is appropriate.
A garage, home gym, basement wellness room or other water-tolerant space can make a beautiful cold plunge location.
But think through one very practical question:
What happens when water gets on the floor?
Because it will.
Even if you're incredibly careful, water comes out with you.
Consider:
-
waterproof or water-resistant flooring
-
drainage
-
condensation
-
ventilation
-
nearby electrical outlets
-
how you'll fill the plunge
-
how you'll empty it
-
how you'll handle an accidental leak
Carpet is probably not the surface I'd choose underneath several hundred pounds of very cold water.
A waterproof mat beneath the plunge can also help protect the floor.
Step 2: Start With a Flat, Level Surface
Your portable cold plunge should sit on a stable, level surface capable of supporting its filled weight.
Avoid sharp gravel, exposed screws, jagged concrete edges, sticks or anything else that could damage an inflatable tub.
This is where the included protection mat becomes useful.
For example, the RevX Inflatable Cold Plunge Tub Classic includes a protection mat specifically for placing beneath the tub.
Once the mat is down, position the deflated plunge exactly where you want it before inflating.
And take a moment to imagine yourself actually using it.
Can you comfortably get in?
Can you get out?
Is there room for a step if you need one?
Can you access the drain?
If you eventually add a chiller, is there space beside the tub for it?
Can you reach your electrical outlet without running cords through standing water?
These little questions matter.
Step 3: Inflate Your Portable Cold Plunge
Now comes the satisfying part.
Unfold the plunge completely and inspect it before inflation.
Make sure there aren't any obvious punctures, damaged seams or shipping damage.
Locate the inflation valves.
Then use the manufacturer's recommended pump and pressure.
Don't assume that "harder is better."
Inflatable cold plunges are designed to operate within specific pressure ranges, and overinflating can put unnecessary stress on seams and valves.
The RevX portable tubs use heavy-duty drop-stitch PVC, similar to the construction used in inflatable paddleboards.
Drop-stitch construction uses thousands of internal threads to connect the inner surfaces of the material. When inflated, those threads help the walls hold their shape rather than expanding like a pool float.
That's why a good inflatable cold plunge can feel surprisingly rigid once it's properly inflated.
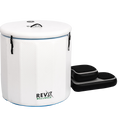
The RevX Inflatable Cold Plunge Tub Classic, Deluxe and Barrel all inflate in under two minutes using their included manual pumps.
So this part really shouldn't take long.
Which Portable Cold Plunge Shape Is Best?
This depends on how you like to sit.
And on your body.
Traditional Tub Shape
A longer tub allows you to sit with your legs extended or partially bent.
The RevX Inflatable Cold Plunge Tub Classic is designed for individuals up to 6'4", giving you a comfortable portable setup without requiring a permanent installation.
It's the portable plunge I'd look at if you want a versatile starting point that can grow with your routine.
You can begin with water and ice.
Then, if cold plunging becomes something you love, the Classic has inlet and outlet ports designed to connect with compatible RevX filtration and chiller equipment.
That means you don't necessarily have to buy the entire automated system on day one.
Extra-Large Tub
If you're taller or simply don't want to feel confined, size matters.
The RevX Inflatable Cold Plunge Tub Deluxe is the largest inflatable option in the current RevX lineup.
It's designed to accommodate users up to 7'2" or even two people and holds approximately 150 gallons at its minimum fill line.
That's a lot more room.
It also means more water to cool, so keep that in mind when deciding between ice and a chiller.
The Deluxe is another good example of why choosing the tub should come before choosing the cooling system.
Water volume matters.
Upright Barrel
Some people prefer a more upright cold-plunge position.
That's where the RevX Inflatable Cold Plunge Barrel comes in.
It's designed for users up to 6'3" and includes inflatable steps, which can make getting into the taller barrel-style design easier.
Like the other RevX inflatable options, you can start with ice and later connect compatible filtration and chilling equipment.
There really isn't one "correct" cold plunge shape.
Choose the one you'll feel comfortable getting into regularly.
Step 4: Decide How You're Going to Make the Water Cold
Now we get to one of the biggest decisions in any home cold plunge setup:
Ice or chiller?
Both work.
They simply create very different routines.
Option 1: Setting Up a Cold Plunge With Ice
This is the simplest possible setup.
Inflate your plunge.
Fill it with water.
Add ice.
Measure the temperature.
Get in.
That's it.
There is something wonderfully uncomplicated about that.
And if you're brand new to cold plunging, starting with ice can make a lot of sense.
You can find out:
Do I actually enjoy this?
before investing in a more elaborate system.
The RevX Inflatable Classic, Deluxe and Barrel can all be used this way.
Their insulated construction and covers help slow heat gain between sessions.
How Much Ice Do You Need for a Cold Plunge?
Unfortunately, there isn't one universal answer.
The amount of ice required depends on:
-
starting water temperature
-
water volume
-
outdoor temperature
-
tub insulation
-
desired final temperature
-
ice temperature
-
how much ice melts during cooling
Cooling 150 gallons of summer hose water is very different from cooling 70 gallons of already-cold winter water.
That's why I prefer using a thermometer rather than relying on a fixed number of bags.
Add ice gradually.
Stir or circulate the water.
Measure.
Then add more if needed.
You're trying to reach a temperature—not win an ice-buying competition.
Option 2: Setting Up a Cold Plunge With a Water Chiller
This is where cold plunging at home becomes much more convenient.
Instead of repeatedly buying bags of ice, a water chiller removes heat from the circulating water and helps maintain your selected temperature.
You set the system.
The water cools.
And your plunge can be ready when you are.
If cold plunging becomes part of your regular routine, this convenience can be a huge upgrade.
Because once again, I come back to the same idea with almost every home wellness tool:
Consistency becomes easier when setup becomes easier.
If every plunge requires driving to buy bags of ice, hauling them home and waiting for the water to cool, you may eventually decide:
"I'll do it tomorrow."
If the water is already cold?
You just get in.
How Does a Cold Plunge Chiller Connect?
This is where setup guides sometimes make things sound more complicated—or more universal—than they really are.
A typical cold-plunge water loop may look something like:
Tub → Pump → Filter → Chiller → Tub
Water leaves the tub.
The pump moves it through the system.
The filter removes debris.
The chiller removes heat.
The cooled water returns to the tub.
Simple in concept.
But this is important:
Do not assume every chiller and filtration system must be connected in exactly that order.
Different manufacturers may specify different component placement, flow direction, hose sizes, valves or sanitation equipment.
Always follow the installation instructions for the equipment you actually own.
Your equipment manual takes priority over a generic diagram on the internet.
Step 5: Understand the Inlet and Outlet Ports
If your portable cold plunge is chiller-compatible, you'll usually see two plumbing connections.
One allows water to leave the tub.
The other allows treated or chilled water to return.
Before connecting anything:
-
Identify the inlet and outlet.
-
Check the required fitting size.
-
Confirm hose compatibility.
-
Inspect gaskets and seals.
-
Make sure threaded connections are seated correctly.
-
Follow the equipment's specified flow direction.
Don't force fittings.
And don't assume that two products are compatible simply because both have hoses.
For example, the RevX Classic uses molded 1-inch custom ports, while the current Deluxe and Barrel specifications use 1/2-inch threaded connections.
Those differences matter when planning accessories.
Step 6: Add Filtration If You Want Easier Water Maintenance
If you're going to leave water in your cold plunge between sessions, filtration becomes increasingly important.
Think about everything that can enter the water:
-
skin cells
-
hair
-
sweat
-
dust
-
grass
-
pollen
-
dirt
-
body oils
A cover helps.
Showering before you plunge helps.
But circulating filtration can make water maintenance much easier.
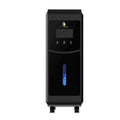
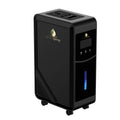
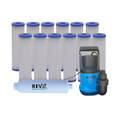
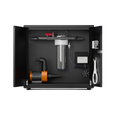
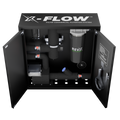
This is where something like the RevX X-FLOW Cold Plunge Filtration System can turn a simple portable tub into a more complete home cold-plunge setup.
The X-FLOW combines:
-
a 200W high-flow pump
-
approximately 2,720+ GPH actual water throughput
-
an 18W UV-C sterilizer
-
a 20-micron pleated cartridge filter
-
continuous circulation capability
and it arrives pre-assembled.
The filter physically captures debris and sediment while UV-C is used within the enclosed system as another water-management tool.
For someone who wants the convenience of a portable tub without wanting to constantly dump and refill it, that kind of filtration system can be a very worthwhile upgrade.
UV vs. Ozone Cold Plunge Filtration
RevitaSpring currently offers two different RevX approaches to water sanitation.
The X-FLOW uses UV-C.
The RevX Ozone Water Filtration System uses an ozone generator along with a 20-micron filter and a 1,700 GPH pump.
They're not exactly the same technology.
UV-C exposes circulating water to ultraviolet light inside the system.
Ozone systems introduce ozone into the water-management process according to the equipment's operating instructions.
Neither means you can simply forget about water maintenance forever.
You still need to:
-
inspect the water
-
maintain filters
-
follow cleaning schedules
-
monitor system performance
-
follow the manufacturer's sanitation recommendations
Think of filtration as making cold-plunge ownership easier—not making maintenance disappear.
Step 7: Connect Everything Before Turning the Equipment On
This sounds obvious.
But it deserves its own section.
Do not run pumps or chillers dry unless the equipment is specifically designed to allow it.
Once your hoses are connected and your plunge contains enough water:
Open any required valves.
Confirm the water path is unobstructed.
Prime the pump if required.
Start circulation according to the manufacturer's instructions.
Then watch the system.
Don't walk away immediately.
Look at every connection.
Do you see dripping?
Is a hose collapsing?
Are there air bubbles that shouldn't be there?
Is water actually returning to the tub?
Does the pump sound normal?
Is the chiller detecting adequate flow?
It is much easier to tighten a fitting now than discover a puddle an hour later.
Step 8: Think About Electrical Safety
Water and electricity deserve respect.
If your setup includes a:
-
water chiller
-
circulation pump
-
UV system
-
ozone system
-
heater/chiller combination
follow the electrical requirements in the manufacturer's manual and applicable local electrical codes.
Use properly protected outlets as required.
Keep electrical connections away from areas where water collects.
Don't create a maze of extension cords across wet flooring.
And don't assume that because a product is designed for outdoor use, every plug and connection can sit in the rain.
For example, the RevX X-FLOW components are rated IPX4, meaning they're designed for splash resistance. That is not the same as being waterproof or designed for submersion.
Plan your electrical setup as carefully as you plan the tub.
Step 9: Fill the Cold Plunge
Now you're finally ready for water.
A standard garden hose is usually the easiest option for portable tubs like the RevX inflatable models.
Before filling:
Make sure the drain is closed.
Make sure plumbing connections are secure.
Make sure the tub is sitting where you actually want it.
Then begin filling.
You don't necessarily want to fill all the way to the rim.
Remember:
You're about to get into it.
Your body displaces water.
Leave enough room so your first plunge doesn't become an accidental swimming pool for the surrounding floor.
If your tub manufacturer specifies a minimum or maximum fill line, use it.
Step 10: Set Your Temperature
Now comes the fun part.
What temperature should your cold plunge be?
This is where social media sometimes turns cold plunging into a competition.
Someone is always sitting in water that looks approximately two degrees warmer than an iceberg.
You don't need to do that.
Cold-water immersion doesn't have to be painfully extreme to be cold.
If you're new, a moderate cold temperature can be plenty.
You can always adjust as you learn how your body responds.
The goal isn't:
"How cold can I survive?"
It's:
"What temperature can I use safely and consistently?"
That mindset makes a much better long-term routine.
Your First Cold Plunge: Don't Try to Win
Your first session is not the time to prove anything.
Cold water produces an immediate physiological response.
Breathing may become faster.
Your heart rate and blood pressure can change.
You may feel a strong urge to get out.
That's why beginners should approach cold exposure gradually and thoughtfully.
Start conservatively.
Pay attention to your breathing.
Don't force yourself to remain in the water because someone online told you that a certain number of minutes is "required."
And don't plunge alone, especially while you're learning how your body responds.
Cold water is powerful.
Respect it.
How to Get Into a Portable Cold Plunge Safely
This seems almost too basic to mention.
Until you're standing beside a wet inflatable tub trying to climb over the side.
Make sure the area around the plunge isn't slippery.
Use steps if your model includes or supports them.
Hold a stable surface if needed.
Enter slowly and deliberately.
This is one reason I like that the RevX Inflatable Barrel includes inflatable steps.
The barrel design is taller and more upright, so having a dedicated way to step in and out makes practical sense.
And remember:
Getting out matters too.
Cold can temporarily affect coordination and how steady you feel.
Make sure your exit path is clear before you get in.
How Do You Keep a Portable Cold Plunge Clean?
Here's the part nobody puts in the beautiful Instagram video.
Water needs maintenance.
But you can make it much easier.
A good basic routine includes:
Shower before plunging when possible
This reduces the amount of:
sweat,
lotions,
body oils,
deodorant,
dirt
and other material entering the water.
Keep the plunge covered
A cover helps keep out:
leaves,
bugs,
dust,
pollen
and other debris.
It also helps insulated tubs maintain colder water between sessions.
Filter the water
If you're using a filtration system, maintain it according to the manufacturer's instructions.
For example, RevX recommends changing the X-FLOW's 20-micron cartridge approximately every 2–4 weeks depending on usage.
Clean the tub itself
Filtration doesn't mean the walls and surfaces never need cleaning.
Follow your tub manufacturer's recommendations for cleaning products and frequency.
Avoid harsh chemicals that could damage inflatable PVC or seals.
Inspect the water
If water looks cloudy, smells unusual or develops visible growth, don't simply assume the filtration system will fix everything.
Address the water quality before using the plunge.
How Often Should You Change Cold Plunge Water?
There isn't one universal schedule.
Water-change frequency depends on:
-
how many people use the plunge
-
how often it's used
-
whether users shower first
-
whether the plunge is covered
-
whether water is continuously filtered
-
sanitation method
-
outdoor debris
-
water chemistry
-
local environmental conditions
A plunge used by one person with good hygiene, a cover and continuous filtration is very different from a tub used by several people with no filtration.
Rather than following an arbitrary calendar date, follow your equipment's water-care instructions and pay attention to water quality.
How Do You Drain a Portable Cold Plunge?
Think about this before filling it.
Seriously.
Where will those gallons of water go?
Portable cold plunges typically include a drain connection, but gravity drainage only works well if the water has somewhere lower to travel.
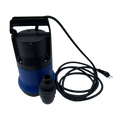
If your plunge sits somewhere without convenient gravity drainage, a dedicated drain pump can make emptying it significantly easier.
RevitaSpring carries the RevX Cold Plunge Drain Pump specifically for this purpose.
This is one of those accessories that may seem unnecessary—until you're staring at a full plunge in a location where gravity is not your friend.
Plan your drainage before your first fill.
How to Make Your Portable Cold Plunge More Energy Efficient
Once you add a chiller, your setup is no longer only about getting water cold.
It's about keeping it cold efficiently.
A few things make a difference.
Use the cover
This is easy.
Don't leave an uncovered tub absorbing heat all day.
Choose an insulated plunge
The air core in drop-stitch inflatable construction provides insulation, and the RevX tubs include insulated covers.
That reduces heat transfer compared with an uninsulated container.
Keep it out of intense direct sun when practical
Your chiller shouldn't have to spend the afternoon fighting the sun if you can avoid it.
Maintain good water flow
A clogged filter or restricted hose can reduce system performance.
Give the chiller ventilation
Chillers remove heat from water and release that heat into the surrounding environment.
Don't stuff one into an enclosed cabinet unless the manufacturer specifically permits it.
It needs appropriate airflow.
Should You Leave Your Cold Plunge Chiller Running All the Time?
That depends on the chiller and system design.
Some cold-plunge systems are designed to maintain a set temperature automatically.
Some pumps and filtration systems are designed for continuous operation.
Others have specific recommended schedules.
For example, the RevX X-FLOW pump is designed for continuous 24/7 operation.
The RevX Ozone Water Filtration System is different: its pump can operate continuously, but RevX recommends running the ozone generator on a timer for approximately one hour per 24-hour period rather than continuously.
That's exactly why I don't like universal advice such as:
"Just leave everything running 24/7."
Know what each component is designed to do.
Follow its instructions.
Portable Cold Plunge Setup With Ice vs. Chiller
So which should you choose?
Ice may be right for you if:
You're just starting.
You don't know how frequently you'll plunge.
You want the lowest initial investment.
You only plunge occasionally.
You travel with your tub.
You enjoy keeping the setup simple.
A chiller may be right for you if:
You plunge frequently.
You're tired of buying ice.
You want consistent temperature control.
You want the water ready without advance preparation.
You live somewhere warm.
You want cold plunging to become part of your normal routine.
And this is why I particularly like portable systems that allow you to start with ice and upgrade later.
You don't have to predict your entire wellness routine before you've taken your first plunge.
A Portable Cold Plunge Can Grow With You
This is one of my favorite things about the RevX portable cold-plunge system.
You can build it in stages.
Stage One: Keep It Simple
Start with the RevX Inflatable Cold Plunge Tub Classic.
Inflate it.
Fill it.
Add ice.
Plunge.
That's enough.
Stage Two: Make Cooling Easier
If you find yourself plunging regularly and buying ice constantly, add a compatible water chiller.
Now your water can cool automatically.
Stage Three: Make Water Care Easier
Add something like the RevX X-FLOW Cold Plunge Filtration System for continuous circulation, 20-micron filtration and UV-C sanitation.
Now you've moved from:
portable ice bath
to
automated home cold-plunge system.
And you didn't have to buy everything at once.
I really like that flexibility.
What If You Want a Permanent Cold Plunge Instead?
Portable isn't right for everyone.
Maybe you already know:
"I'm doing this long term. I want the finished version."
That's where a permanent system becomes worth considering.
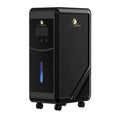
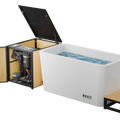
The RevX Acrylic X Tub Cold Plunge with LUX Chiller & Filtration System is a very different type of setup from an inflatable tub.
The acrylic X Tub is more than 34 inches tall and uses three-inch foam-insulated walls. It's designed for upright, above-the-shoulder submersion and includes adjustable water-flow jets.
The included 1.5 HP LUX system can cool water as low as 34°F or heat it as high as 104°F.
And because the chiller and filtration system are included, you're not piecing the setup together yourself.
This is more of a permanent home-wellness installation than a portable ice bath.
Neither approach is inherently better.
They're for different people.
Common Portable Cold Plunge Setup Mistakes
Let's save you from a few headaches.
Mistake #1: Filling It Before Choosing the Final Location
Remember the water-weight calculation?
Choose first.
Fill second.
Mistake #2: Ignoring Drainage
Eventually that water has to come out.
Know where it's going.
Mistake #3: Putting the Tub on an Unsafe Surface
Use a flat, stable surface capable of supporting the full filled weight.
Mistake #4: Overinflating the Tub
Follow the manufacturer's recommended inflation pressure.
More air isn't automatically better.
Mistake #5: Turning the Chiller On Before Confirming Water Flow
Chillers and pumps have operating requirements.
Make sure the system is properly filled, connected and primed before operation.
Mistake #6: Restricting Chiller Airflow
Your chiller needs to release heat somewhere.
Give it the ventilation clearance specified by its manufacturer.
Mistake #7: Assuming UV or Ozone Means "No Maintenance"
It doesn't.
You still need to inspect and maintain your water.
Mistake #8: Forgetting About Electricity
Cold plunge water and improvised electrical setups are not a good combination.
Follow equipment instructions and applicable electrical codes.
Mistake #9: Starting Too Cold
Your first plunge does not need to be extreme.
Cold enough is cold enough.
Mistake #10: Leaving the Cover Off
Your cover helps keep debris out and cold in.
Use it.
Portable Cold Plunge Setup Checklist
Before your first plunge, make sure:
-
the tub is on a flat, load-appropriate surface
-
the protective mat is in place
-
the tub is properly inflated
-
valves and drain fittings are secure
-
chiller/filtration hoses are correctly connected if used
-
all powered equipment has appropriate electrical protection
-
the chiller has adequate ventilation
-
the tub is filled to the manufacturer's recommended level
-
water is circulating properly
-
connections have been checked for leaks
-
the water temperature has been measured
-
the entry and exit area is clear and non-slip
-
the cover is ready for use afterward
-
you've planned how the tub will eventually drain
If those boxes are checked, you're in very good shape.
Frequently Asked Questions About Setting Up a Portable Cold Plunge
How do you set up a portable cold plunge at home?
Place the plunge on a flat, sturdy surface, use the included protective mat if provided, inflate it according to manufacturer instructions, secure the drain and fittings, fill it with clean water, and cool the water using ice or a compatible chiller. If using a chiller or filtration system, follow the manufacturer's required plumbing, flow and electrical instructions before operating the equipment.
Do portable cold plunges need plumbing?
Not necessarily.
Portable tubs such as the RevX Inflatable Classic can simply be filled with a garden hose and used with ice.
Permanent household plumbing isn't required.
Compatible ports allow you to add a closed-loop chiller or filtration system if desired.
Can you use a portable cold plunge without a chiller?
Yes.
Ice is the simplest way to start.
An insulated portable tub and cover can help slow heat gain, while a chiller becomes more useful if you plunge frequently and want automatic temperature control.
Is a cold plunge chiller worth it?
It can be if you cold plunge regularly.
The main benefit is convenience and consistent temperature control. Instead of purchasing and adding ice for every session, the chiller removes heat from the water and can help maintain a selected temperature.
Do I need a filter for my cold plunge?
If you empty and refill your plunge frequently, a full filtration system may not be necessary.
If you plan to leave water in the tub between sessions, filtration can make water management much easier by continuously removing debris and, depending on the system, adding UV-C or ozone sanitation.
Where should I put my portable cold plunge?
Choose a level, sturdy, water-tolerant surface capable of supporting the filled tub, water and user.
Consider drainage, electrical access, chiller ventilation, sun exposure, weather and ease of entry before filling.
Can I put my cold plunge in the garage?
A garage can work well if the floor supports the filled weight, water spills can be managed, drainage is practical, ventilation is adequate and powered equipment can be safely connected.
Can I leave an inflatable cold plunge outside?
Some models, including RevX inflatable cold plunges, are designed for indoor and outdoor use.
However, always follow the manufacturer's recommendations regarding extreme weather, freezing temperatures, direct sun and connected electrical equipment.
How do I keep my cold plunge water clean?
Cover the plunge when not in use, shower before entering when practical, use appropriate filtration and sanitation if you're keeping water for extended periods, maintain filters, clean tub surfaces and replace water when needed.
How often should I change my cold plunge filter?
It depends on the system.
For the RevX X-FLOW, the manufacturer recommends replacing the 20-micron cartridge approximately every 2–4 weeks depending on use.
Should a cold plunge chiller run continuously?
Follow your specific equipment instructions.
Some circulation pumps are designed for continuous operation while other components have different schedules. For example, the RevX X-FLOW is designed for continuous operation, while RevX recommends limiting operation of the ozone generator in its ozone filtration system with a timer.
How long does it take to set up an inflatable cold plunge?
Inflation itself can be very fast. RevX's Inflatable Classic, Deluxe and Barrel are designed to inflate in under two minutes using the included manual pump.
Total setup time depends more on filling the tub and cooling the water than on inflating it.
Can I travel with a portable cold plunge?
That's one of the major advantages.
The RevX inflatable tubs can be deflated and packed for transportation, allowing you to bring the tub to different locations rather than committing to a permanent installation.
The Best Cold Plunge Setup Is the One You'll Actually Use
It's easy to make home wellness complicated.
We research.
We compare.
We optimize.
We convince ourselves we need the perfect setup before we can begin.
But your first cold plunge doesn't need to look like a professional recovery center.
It can be:
a portable tub + water + ice.
That's enough to start.
Then see what happens.
Maybe you plunge occasionally and love the simplicity of ice.
Wonderful.
Maybe you start using your plunge several times a week and decide you never want to buy another bag of ice again.
Add a chiller.
Maybe you love having the water ready but get tired of changing it.
Add filtration.
Maybe cold plunging becomes such an important part of your routine that eventually you want a permanent acrylic setup.
You can do that too.
This is exactly what I love about creating wellness at home.
You don't have to build someone else's idea of the perfect wellness routine.
You build yours.
And when the things that help you feel refreshed, grounded and cared for are right there at home, taking care of yourself becomes a little easier to fit into real life.
Ready to Create Your Home Cold Plunge Setup?
If you've been thinking about cold plunging but felt intimidated by the setup, I hope this guide made it feel much simpler.
You don't need a complicated plumbing project to begin.
The RevX Inflatable Cold Plunge Tub Classic is a wonderful starting point if you want a durable, insulated portable plunge that you can use with ice now and upgrade with compatible chilling and filtration equipment later.
Need more room?
The RevX Inflatable Cold Plunge Tub Deluxe accommodates users up to 7'2" or two people.
Prefer an upright plunge?
The RevX Inflatable Cold Plunge Barrel offers a compact upright design and includes inflatable steps.
And when you're ready to make water care easier, the RevX X-FLOW Cold Plunge Filtration System adds continuous circulation, fine filtration and UV-C sanitation.
If you already know you want a more permanent, fully integrated system, the RevX Acrylic X Tub with LUX Chiller & Filtration System brings the tub, chilling and filtration together in one premium setup.
Explore RevitaSpring's cold-plunge options and choose the system that fits your space, your routine and where you are in your cold-plunge journey.
And if you're unsure which combination makes sense?
Reach out.
I'm always happy to help you sort through the options.
Because I'd rather help you build a cold-plunge setup you'll actually use than sell you equipment you don't need.
That's what RevitaSpring is here for.
This article is provided for general educational purposes and is not medical advice. Cold plunges sold by RevitaSpring are intended for general wellness and are not intended to diagnose, treat, cure or prevent disease. Cold-water immersion creates significant physiological stress. Consult a qualified healthcare professional before cold plunging if you have cardiovascular disease, uncontrolled high blood pressure, Raynaud's disease, cold sensitivity, are pregnant or have another condition that may make cold exposure unsafe. Follow all manufacturer safety, installation, electrical and maintenance instructions for your specific cold plunge, chiller and filtration equipment.